
Table of Contents

What are Child Name Servers ?
Child name servers are DNS (Domain Name System) servers that are registered under a parent domain. They act as authoritative DNS servers for that specific domain or its subdomains. Here’s a breakdown:
- Parent and Child Domains:
- A parent domain is a higher-level domain, like
example.com. - A child domain is a subdomain of the parent, like
sub.example.com.
- Child Name Server Setup:
- When a domain owner wants to use their own DNS servers (instead of third-party DNS providers) to manage their domain’s DNS records, they set up child name servers.
- These servers are named under the domain itself, e.g.,
ns1.example.comandns2.example.com.
- Purpose and Function:
- The child name servers are then used to resolve DNS queries for the domain and its subdomains.
- They are listed in the domain’s registry as the authoritative servers for the domain, allowing the DNS system to direct queries to these servers.
- Technical Requirements:
- The IP addresses of these child name servers must be registered with the domain registrar to ensure proper DNS delegation.
Example:
If you own example.com and want to set up your own DNS servers, you might configure ns1.example.com and ns2.example.com as child name servers. You would then register these servers with your domain registrar by providing their IP addresses. These child name servers would become responsible for handling DNS queries for example.com and any subdomains like shop.example.com.
In essence, child name servers are a way for domain owners to maintain control over their domain’s DNS management by using DNS servers hosted within their own domain.
Why we need to create child name servers?
Creating child name servers is often necessary or beneficial for the following reasons:
1. Complete Control Over DNS Management:
- Customization: By creating your own child name servers, you gain complete control over DNS configurations, allowing for custom DNS settings, advanced configurations, and specific optimizations that might not be available with third-party DNS providers.
- Security: Running your own DNS servers can enhance security, as you can implement your own security measures, such as DNSSEC, and protect against DNS-based attacks.
2. Branding and Professionalism:
- Consistency: Using child name servers like
ns1.example.cominstead ofns1.thirdparty.comhelps maintain consistent branding, which can convey a more professional image to clients or users. - Trust: It can build trust with users who see that all aspects of the domain, including DNS, are managed in-house.
3. Redundancy and Reliability:
- Redundancy: By setting up multiple child name servers (e.g.,
ns1.example.comandns2.example.com), you can ensure that your domain remains accessible even if one server fails. - Load Balancing: You can distribute DNS queries across multiple servers to balance the load, improving the reliability and speed of DNS resolution.
4. Integration with Other Services:
- Custom Services: If your domain hosts specific services, such as email servers, web servers, or other applications, child name servers can be tailored to integrate seamlessly with these services.
- Internal Network: For organizations with complex internal networks, child name servers can be configured to resolve internal domains or subdomains, which is useful for large enterprises.
5. Regulatory and Compliance Requirements:
- Legal Requirements: In some industries or regions, there may be regulations that require you to maintain control over your own DNS infrastructure.
- Data Sovereignty: Organizations concerned with data sovereignty might prefer to host their DNS servers within their own country or network to ensure compliance with local laws.
6. Learning and Experimentation:
- Educational Purposes: Setting up child name servers can be a valuable learning experience for IT professionals, providing hands-on experience with DNS, networking, and server management.
- Experimentation: It allows for experimentation with DNS settings, configurations, and features that might not be available or permitted on third-party DNS platforms.
7. Cost Considerations:
- Potential Savings: If you have the necessary infrastructure and expertise, running your own child name servers can be more cost-effective in the long run, especially for large domains or high-traffic websites, compared to paying for premium DNS services.
In summary, creating child name servers offers greater control, security, customization, and reliability for domain management. It is particularly useful for organizations or individuals who need specific DNS configurations, wish to maintain a professional brand image, or want to meet certain regulatory requirements.
How to create child name server ?

Creating child name servers involves several steps, including configuring your DNS server software and registering the child name servers with your domain registrar. Here’s a step-by-step guide:
1. Set Up Your DNS Server(s)
- Install DNS Server Software: Install DNS server software on your server. Common options include BIND (Berkeley Internet Name Domain) for Linux or Windows DNS Server.
- Configure DNS Zones:
- Create a DNS zone for your domain (e.g.,
example.com). - Add the necessary DNS records for your domain, including
Arecords,MXrecords,CNAMErecords, etc. - Ensure that you create
NS(Name Server) records within the zone file to point to the child name servers you want to create (e.g.,ns1.example.comandns2.example.com).
- Create a DNS zone for your domain (e.g.,
2. Assign IP Addresses to Child Name Servers
- Static IPs: Ensure that each child name server (e.g.,
ns1.example.com) has a static IP address. This IP address will be used when registering the name servers with your domain registrar. - A Records: In your DNS zone file, create
Arecords to map each child name server to its corresponding IP address:plaintext ns1.example.com. IN A 192.0.2.1 ns2.example.com. IN A 192.0.2.2
3. Register the Child Name Servers with Your Domain Registrar
- Login to Domain Registrar:
- Access your account with the domain registrar where your domain is registered.
- Locate Name Server Management:
- Find the section for managing or registering name servers. This might be under “DNS Management,” “Advanced DNS,” or similar.
- Register the Name Servers:
- Enter the hostname and corresponding IP address of each child name server (e.g.,
ns1.example.comwith IP192.0.2.1). - Repeat for any additional name servers (e.g.,
ns2.example.comwith IP192.0.2.2).
- Enter the hostname and corresponding IP address of each child name server (e.g.,
4. Update Domain’s Name Server Records
- Set Primary Name Servers:
- After registering the child name servers, you need to set them as the authoritative name servers for your domain.
- Replace the existing name servers with your new child name servers (e.g.,
ns1.example.com,ns2.example.com).
- Propagation Time: Note that DNS changes can take some time to propagate across the internet, usually within 24 to 48 hours.
5. Test the Configuration
- DNS Lookup: Use tools like
dig,nslookup, or online DNS testing tools to verify that your child name servers are resolving DNS queries correctly. - Check Propagation: Ensure that DNS changes have propagated globally, and that your domain is being resolved by the newly created child name servers.
6. Maintain and Monitor the Servers
- Ongoing Management: Regularly monitor the performance and security of your DNS servers. Implement updates and patches as needed to ensure they remain secure and reliable.
- Backups: Consider creating backups of your DNS zone files and configurations.
Example: Setting Up Child Name Servers for example.com
- DNS Server Configuration:
- Install BIND on a Linux server.
- Create a zone file for
example.comwithArecords forns1.example.comandns2.example.com.
- Registrar Registration:
- Login to your domain registrar.
- Register
ns1.example.comwith IP192.0.2.1. - Register
ns2.example.comwith IP192.0.2.2.
- Domain Configuration:
- Update the domain’s name servers to
ns1.example.comandns2.example.com.
- Verification:
- Use
dig example.com NSto verify the correct name servers are being used. - Monitor the DNS resolution and ensure it’s functioning as expected.
By following these steps, you can successfully create and manage child name servers for your domain.
Author
admin@webhostingmumbai.net.in
Related Posts
The Importance of Name Servers in Website Functionality
Importance of name server A name server is a critical component in the Domain Name System (DNS) infrastructure that helps make websites...
Read out all
Understanding Red Hat Linux VPS: Features, Benefits, and Use Cases
Red Hat Linux VPS A Red Hat Linux VPS (Virtual Private Server) is a virtualized server environment that runs Red Hat Enterprise...
Read out all
Comprehensive Guide to Backing Up Your Email Inbox
Methods of email backup Email Inbox can be useful for security, archiving, and accessing important messages offline. Here’s how you can back...
Read out all
Email Aliases in Web-Hosting
What is email aliases ? Email aliases are alternative email addresses that redirect to a primary email account. They allow you to...
Read out all
How to Make Database Backup in cPanel
Taking a Database Backup in cPanel is an important step to ensure that you can restore your website or data in case...
Read out all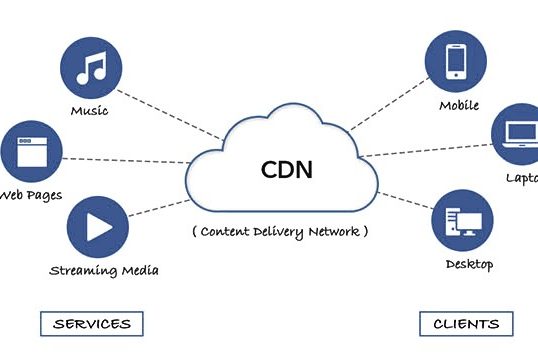
What is a content delivery network (CDN)? | How do CDNs work?
A Content Delivery Network (CDN) is a system of distributed servers strategically placed across different geographic locations to deliver content, such as...
Read out all