Table of Contents
Adding SSL in cPanel involves several steps, depending on whether you’re using a free SSL certificate like Let’s Encrypt or a paid SSL certificate. Here’s a general guide:
1. Obtain an SSL Certificate
- Free SSL (Let’s Encrypt): Many hosting providers offer free Let’s Encrypt SSL certificates directly within cPanel.
- Paid SSL: Purchase an SSL certificate from a trusted Certificate Authority (CA) like Comodo, DigiCert, etc. You’ll receive certificate files after purchase.
2. Log in to cPanel
- Log in to your cPanel account using your credentials.
3. Install the SSL Certificate
Option 1: Using AutoSSL (Let’s Encrypt or Similar)
- In cPanel, look for “SSL/TLS Status” or “Let’s Encrypt SSL” in the “Security” section.
- Select the domain(s) you want to secure with SSL.
- Click “Run AutoSSL” or “Issue” to automatically install the certificate.
- The process might take a few minutes. Once done, your site will be secured with SSL.
Option 2: Manually Install an SSL Certificate
1.Log into your cPanel account
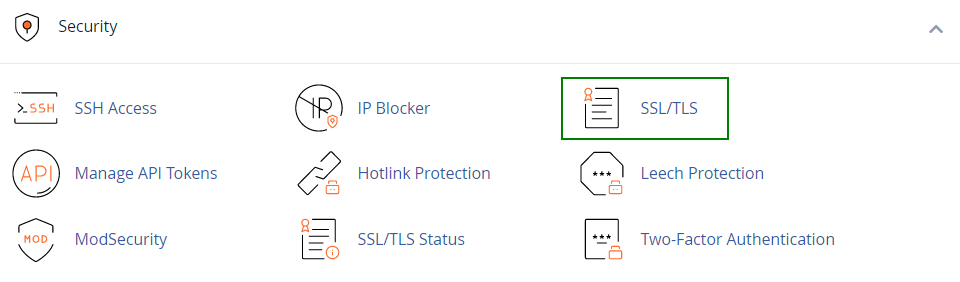
2.Locate and click on SSL/TLS Manager in the Security section:
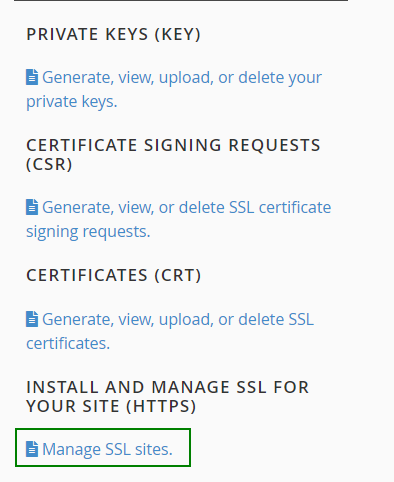
3. Click on Manage SSL Sites under the Install and Manage SSL for your website (HTTPS) menu:
Note: The certificate code can be found in the *yourdomain*.crt file which is usually sent to you in an email from the Certificate Authority. Alternatively, it can be downloaded directly from your account directly.
4.Copy the certificate code
You received from the Certificate Authority including —–BEGIN CERTIFICATE—– and —–END CERTIFICATE—– and paste it into the Certificate: (CRT) field on the next page. The certificate files can be opened with the help of a text editor (e.g., Notepad for Windows or Textedit for macOS) on your computer
5.Click on the Autofill by Certificate button,
It appears next to the certificate entered, and the system will attempt to fetch the domain name and the private key. You may also choose the domain from the drop-down list and manually enter the certificate and private key into the corresponding boxes. If the system fails to fetch the private key, you can locate it in the Private Keys (KEY) section of the SSL/TLS Manager. Please remember to include the Begin/End headers and footers of the certificate and the key. In case the private one is missing, please generate a new CSR code together with the private key and then reissue your SSL certificate.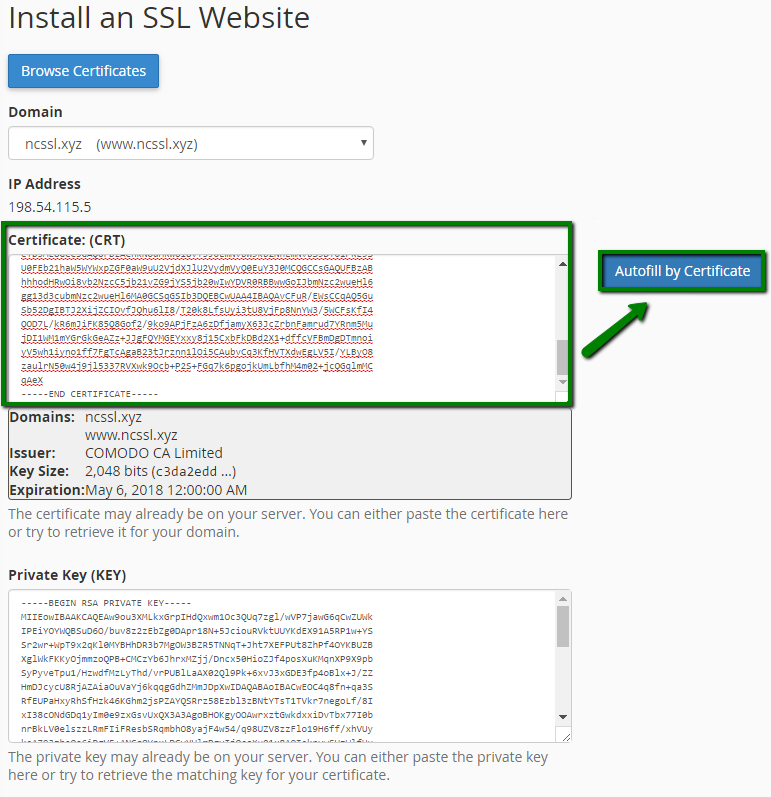
6.Copy and paste the chain of the intermediate certificates�
(CA Bundle) into the box under Certificate Authority Bundle (CABUNDLE) if it is not filled in already.
If you want to use this certificate for Mail Services (Exim and Dovecot), check the “Enable SNI for Mail Services” box. In this case, you can use your domain, for which the SSL certificate has been installed, as a hostname of the mail server configuring your mail clients to work via secured ports.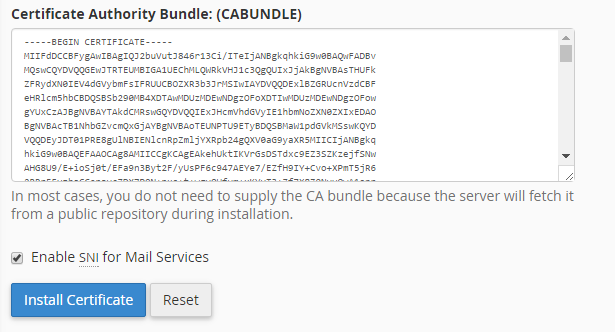
7. Click on Install Certificate.
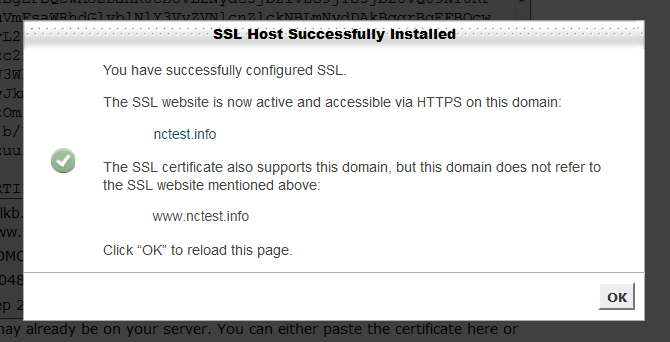
Congratulations! The certificate is now installed on the server for your site. The site should now be accessible via https://. You can check the installation using this tool.
NOTE! Starting from cPanel version 11.60, you can use the installed certificates to log into cPanel/WHM as well as to webmail, ftp and webdisk. The certificate installed for a domain gets assigned to these services automatically, no separate actions are required.
The site should now be accessible via https://. You can check the installation using this tool
4. Verify SSL Installation
- Visit your website with
https://to ensure it’s loading over HTTPS. - Use an online tool like SSL Checker to verify the SSL installation.
5. Force HTTPS (Optional but Recommended)
To ensure all traffic is directed to the HTTPS version of your site:
- Go to the “File Manager” in cPanel.
- Locate your
.htaccessfile in the root directory of your website. - Add the following code to force HTTPS:
apacheconfCopy codeRewriteEngine On
RewriteCond %{HTTPS} !=on
RewriteRule ^ https://%{HTTP_HOST}%{REQUEST_URI} [L,R=301]
- Save the file.
6. Test Your Website
- Clear your browser cache and visit your site using
https://to confirm everything is working properly.
After the certificate has been activated and issued to you by the Certificate Authority, you can proceed with deploying the certificate in your cPanel. Follow the steps below:
Author
admin@webhostingmumbai.net.in
Related Posts
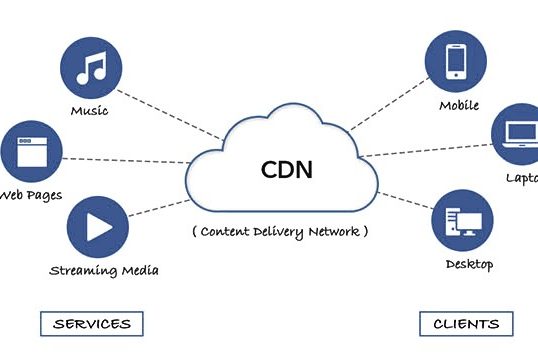
What is a content delivery network (CDN)? | How do CDNs work?
A Content Delivery Network (CDN) is a system of distributed servers strategically placed across different geographic locations to deliver content, such as...
Read out all
Creating and Managing Hosting Packages in WHM
How to Create and Manage Packages in WHM Control Panel Web Host Manager (WHM) is a powerful tool used by web hosting...
Read out all
Activating Free SSL Certificates in cPanel: A Quick Tutorial
Enabling free SSL in cPanel can be done through AutoSSL, which is a feature provided by cPanel that automatically installs and renews...
Read out all
Fedora OS for Web Servers: A Cutting-Edge Platform for Modern Web Hosting
Fedora OS Fedora OS is a popular, open-source Linux distribution known for its cutting-edge features and frequent updates. While Fedora is often...
Read out all
MongoDB in Web Hosting: Scalability, Flexibility, and Performance
What is MongoDB ? MongoDB is a NoSQL, document-oriented database used in web hosting for managing and storing large amounts of unstructured...
Read out all
Understanding IP Block Causes and Effective Resolutions
An IP block is a network security measure that prevents specific IP Block addresses from accessing a network or service. It is...
Read out all